Dependent Drop Downs Tool
Overview
Dependent Drop Downs are essentially drop down options that change depending on what was previously selected in a prior drop down field. Having dynamically changing values helps to ensure clean segmentation of data when working with multiple levels of grouped information.
This tool is built to allow the use of dependent drop downs within Google Sheets by leveraging the data validation drop downs within Google Sheets and dynamically populating the drop down options using an onEdit(e) trigger in a Google Apps Script project bound to the Google Sheet.
The code generated from this tool is an upgraded version of the code found in our Youtube Tutorial Video and allows for an infinite number of subsequent drop downs to be added. It's also set up so that installation of the code into your Google Sheet is made as simple as possible.
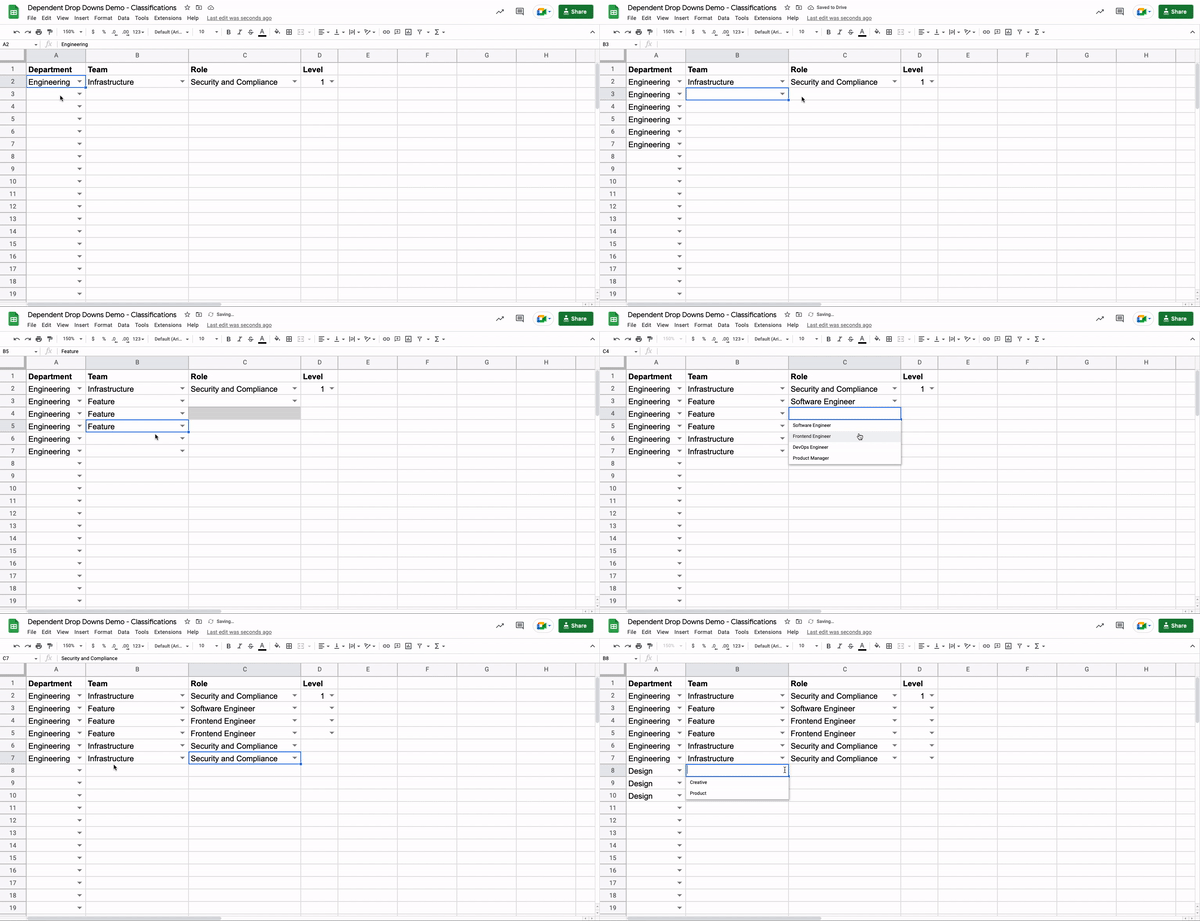
Here's a clip of it in action:

Instructions
-
Open up the Google Sheet you want to install Dependent Drop Downs into (or create a new Google Sheet)
-
Create a new "Tab" that will hold your drop down options data
-
In this new Tab, set up yours data in a grid where the top level options are on the left and the lower level options are to the right. You can add as many columns as you'd like.
-
• Be sure to have all of the cells filled out so that there is a clear parent-child relationship for each cell. Here's how your drop down options data should relatively look

-
-
Once you have your drop down options data set up in its own tab, it's time to fill in the form below to generate your code.
-
Enter in the "Target Sheet Name", which is the name of the Tab where you want the dependent drop downs installed.
-
Enter in the "Mapping Data Sheet Name", which is the name of the Tab you have entered in your drop down options data.
-
Next, enter in the "Starting Column", which is the column where your first drop down will appear in your Target Sheet. The subsequent drop downs will populate to the right of this column, so make sure that they're all next to each over in your Target Sheet.
-
After you've filled in the form, click on the "copy" icon in the upper right-corner of the code preview box. This will copy all of the code to your clipboard
-
Going back to your Google Sheet, click on the "Extensions" option and select "Apps Script" - this will open up a Google Apps Script project that is bound to your Google Sheet
-
Paste in the code you copied and save the file (CMD+s / CTRL+s)
-
Now it's time to run the
initialSetup()function - you can do this by clicking on the drop down located next to the "Debug" button, selecting "initialSetup" from the options, and then clicking on the "Run" button. -
The app will ask you to authorize the code to execute. Just follow the prompts to grant your new script access to make the changes it needs.
-
Once you've authorized the script and the script has completed, go back to your Google Sheet and to your Target Sheet. You'll see a drop down for the entire Starting Column and as you select values, the cell to the right of your selection will update with the options that correspond to your previous selection.
- • It might take about a second or two to populate - that's something you can't get around because we're using an onEdit(e) trigger to dynamically update the dropdown options, which takes at least a second to boot up and run.
Which Sheet should this run on?
Which Sheet is your mapping data located?
Where is the first dropdown located?
Code.gs
0