Drip campaigns (aka email sequences) are a powerful way to re-engage users using a linear fashion. Many email marketers use this technique…
Got some columns that you would rather be rows? Or maybe the other way around? If you've been copy & pasting each one to get it in the way you want it, then you're going to love this How-to.
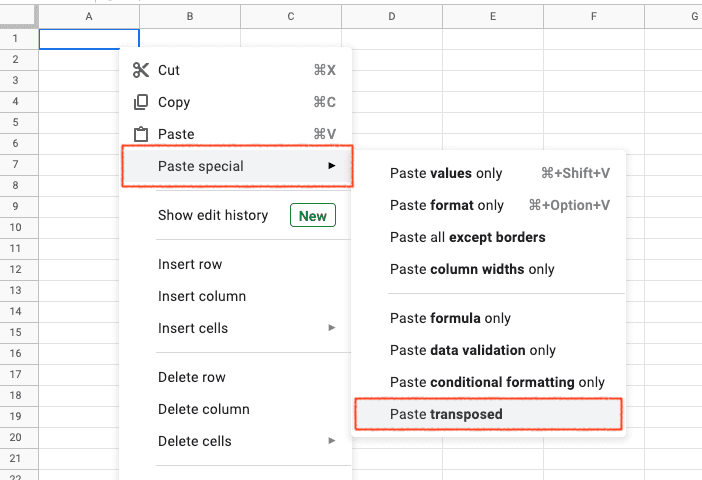
There are two ways to do this really fast. The first way is simply copying everything at once and then using the "Paste special" option found in your right-click menu. You'll see an option for "Paste transposed". This will paste anything you copied to your clipboard as a "flipped" version of it. So if you copied rows A1:A5, it'll paste those 5 rows into 5 columns instead. It works in the other direction as well, so If you selected a bunch of columns it'll paste them as rows.

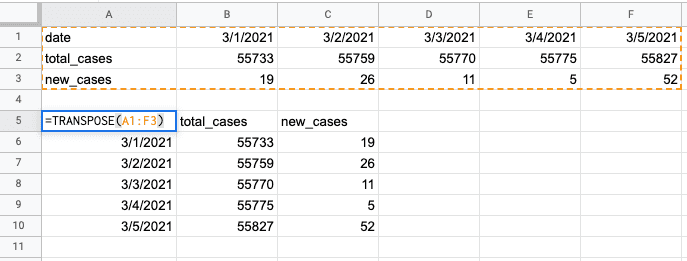
If you have some data you need to transpose but it's also data that changes constantly, the other option is to do it with the =TRANSPOSE formula. All you have to do is put in the cell range you want to transpose and it'll do it for you automatically.

You can also transpose a grid of data if you wanted to. It's a great way to adjust the layout of data to make it easier to read. Here's a case where someone gave us five days of covid-19 data that we'd like to add to our larger data set, but they gave it to us with the dates represented as columns. This is fine for just a few days, but we have months worth of data we need to combine it into. Here we'll just transpose it so that each date is a row and the corresponding data for each date gets mapped perfectly thanks to the transpose formula.
