Drip campaigns (aka email sequences) are a powerful way to re-engage users using a linear fashion. Many email marketers use this technique…
Make sure to go through our guide to basic task management before going through this guide since there's a few things we set up in there that you'll need for this part of the series.
The =QUERY formula is a great way for you to filter down the main list to just what each team member should be doing. It also allows for multiple criteria and ordering, making it ideal for creating a todo list. Let's start off with creating a new Tab called "[Todo] John Doe" and then add this QUERY formula to cell A1:
=QUERY(Tasks,"Select * Where A is not null and D = 'John Doe' and G <> 'Done' Order by D asc, F asc", 1)
Notice how we're using the Named Range "Tasks" instead of the A1 Notation? Be sure to checkout our "Howto" on Named Ranges for how to set that up.
In the QUERY formula, you'll also see D = 'John Doe' and G <> 'Done'. The "D" is for Column D which contains our Assignee. The "G" represents Column G which holds our Status. Since it's a todo list, we'll want to use both of these fields as our criteria.
You may have also noticed the sorting method we used at the end: Order by D asc, F asc. This is just saying to order the Assignee by ascending order and also Column F, our Due Date column, by ascending order. Since it's a todo list, having it ordered by the due date is helpful.
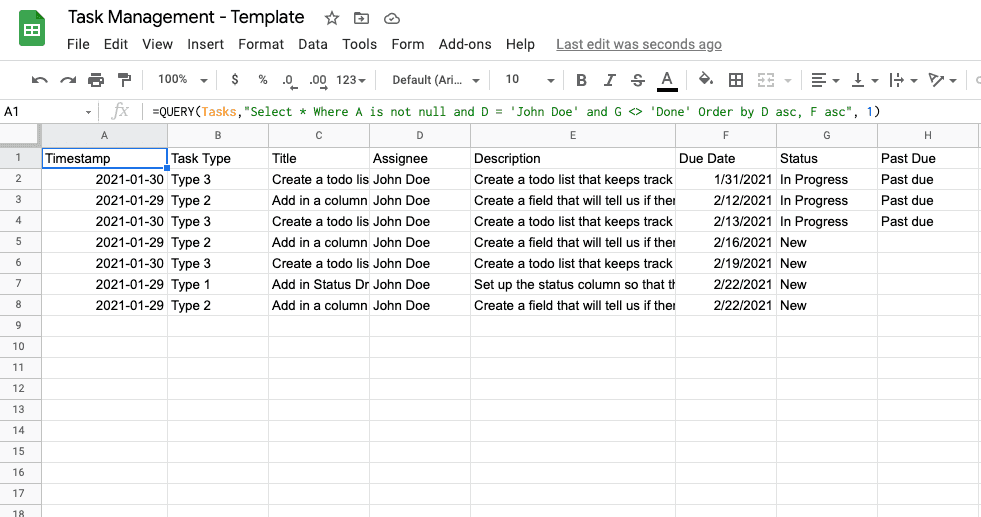
Once you have the formula placed in Cell A1 or your new tab, it should look similar to this:

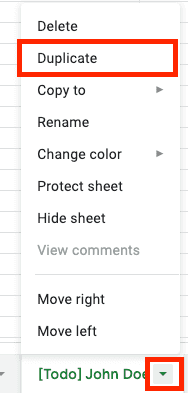
This step is fairly simple. Take the Todo tab you made above and rename it to the Assignee you chose. Once you've done that, duplicate the sheet for each Assignee you have.

For each sheet that you have, update the =QUERY() formula so that the right Assignee is being used in the formula. For each tab, you'll have a different D = 'ASSIGNEE'. Rename the tab so that it matches up and you're all set.

Now that you have a Todo list per each assignee, your team can stay focused and productive. Keep in mind that they'll still have to go back to the "Tasks" tab to update the statuses. We'll cover how to make that easier in our next guide which covers creating linkbacks to the specific task on the Tasks tab.
Continue to our guide on creating dynamic backlinks here.
To skip the backlinks and go straight to removing the need your team members to go back to the "Tasks" tab, check out our guide to checkbox controls.